
How to Mix Like a Pro, No Matter Your Experience
The clock is ticking. The producers will be in to listen to your mix in three days, and this is the biggest session you've ever seen! Where do you even start? If you don’t finish, what’s going to happen? They’re going to be furious. You’re going to get fired. Will you ever work in this town again?
Hold on. Take a breath.
Here’s the good news, I can teach you everything you need to know to get your mix done on time and beyond your client’s expectations in the time it takes to read this blog. So let’s not waste another minute. We’ve got mixing to do.
Realize You’re Better Than You Think
Before we begin; to put your mind at ease, just know... you’re better than you think you are. I bet, given enough time, you could do a better job than I do.
But that’s the key: time.
Most hour-long shows are mixed in three days. That gives you one to two days to do your version of the mix and one day for notes from the producers and the network. That’s not a lot of time. If you’re just starting out, focus on making choices that help you finish on time while still delivering a cinematic level of sonic quality.
If you’re a young professional, you still need to make tough choices, but your execution is more polished. And if you’re a seasoned pro, many of your choices come instinctively... but reminders like this still help sharpen your edge.
Below I'm listing the elements you need to focus on and the tools you should master at three different stages of your mixing career.
So, no more blabbing, on with the show!
Start Strong as a Beginner
Focus on:
Mixing Dialogue, Music, and Sound Effects
Matching ADR to production dialogue
Adding Foley where needed
Why? Because Dialogue, Music and FX will carry the weight of the film. They are the core concern for many of your clients. Foley is absolutely necessary but for a young mixer, it can be challenging to reign in the thousands of sounds in a single foley session.
Master These Tools
Automate Your Mix
Automation is essential. It lets you finesse your mix with precision and helps you adjust things during client revisions without losing the parts they already loved.
Use These Automation Modes:
Touch/Latch - Once you touch a fader the automation will engage, when you let go it will disengage. When you touch a knob (or pot), it will engage and stay engaged until you stop playback.
Preview - Preview let's you test automation changes without writing them to your session.
Write to All - All the changes you made in preview will be written to the area you have highlighted.
Copy All Automation - If you like what you did in one part of the mix and want to apply it to another place, copy your automation with this.
Paste Special All Automation - After you Copy All Automation, write it to the location your highlighting with this.
Apply EQ with the “Search and Destroy” Method
Film scenes can use dozens of mics and thousands of sound effects. Your job is to make them sound cohesive. EQ is your most reliable tool, especially when starting out.
To get your best results with EQ start with subtractive EQ. What does that mean? Subtractive EQ is simply taking away frequencies rather than adding them. Here's how to get started using the "Search and Destroy" method.
Follow these steps:
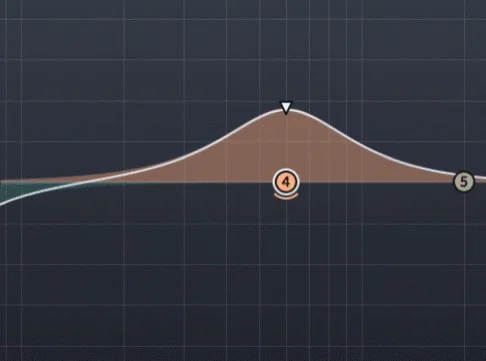
Boost the gain on a narrow frequency band.
Sweep the frequency range to find an offending tone. When you find it, it’ll usually whistle.
Reduce that frequency and widen the band until the tone disappears.
Double-check that you aren’t removing essential character, like vocal presence.
Keep practicing this method until your ears know what to do automatically. That’s how professionals are made.
Use Reverb with Purpose
Stick to the essentials. You only need to learn three settings:
Reverb Type (Room, Hall, Chamber, Plate, Spring)
Reverb Time (How large the space feels)
Pre-delay (How long before the first reflections arrive)
Pro Tip:
Use Rooms for dialogue, foley and effects
Halls and Chambers for music
Plates for sound design
That’s it. If you have extra time, refine these first. They’ll get you 99% of the way to a professional mix without wasting time chasing fancy plugins.
Level Up as a Young Professional
Focus on:
Mastering everything in the last section
Mixing Production FX (PFX) and Foley
Muting unnecessary or overcut layers
Refining your reverbs and panning
Why? PFX and Foley are the keys that make your actors movement in the film real. From grabbing a cup of coffee, knocking on a turtle shell, or trying on clown shoes for the first time and tripping into a ball pit. Doing this will give the film life. Refining your reverbs and panning will open up the world so it feels like we are in the movie with the characters. The screen almost expands around us! Now you're a big time mixer!
Expand Your Toolkit
Build Smart Templates
Templates save you time and reduce stress. I use templates for:
TV (1-person mixes & 2 person mixes)
Film(1-person mixes & 2 person mixes)
Commercials and radio work
Templates help you:
Jump into a mix with confidence
Maintain consistency across sessions
Monitor loudness properly from the start
This is the most valuable time-saver you can create for yourself.
Add Low-End with Harmonic Tools
If you want your mix to move the room, use subharmonic generators like LowEnder, LowAir, or Subquake. They generate low-end energy based on your source and route it to the sub or mains.
Examples:
A speeding car should shake the room
A monster’s roar should feel massive
A lightning strike should be sharp and full
Use Delay Creatively
Delays are like reverb, but with fewer, more audible echoes. Reverbs sound like fading space. Delays sound like actual repeats.
Use delay to:
Create environmental space
Distort perception
Simulate inner thoughts or surreal moments
Delays are versatile. Have fun!
Use Noise Reduction Carefully
I didn’t include this in the beginner section for a reason: it’s easy to mess up! Most unwanted noise can be managed with EQ. But with tight deadlines, noise reduction has become essential.
Use with caution:
Don’t just remove noise. Protect the performance.
Over-processing can make dialogue sound like it’s underwater.
As my Uncle Ben said: “With great noise reduction comes great responsibility.”
Mix Seamlessly as a Veteran
Focus on:
Blending all elements into a seamless soundscape
Adding emotional weight through reverb, delay, and dynamics
Keeping the audience fully immersed. One wrong sound can break the spell
Why? At this point in your career you are making more executive decisions about the mix. You understand the feeling of a scene and how to get the audience to feel that with sound. Pushing and pulling ambience to get the audience to feel afraid, excited, awe. Use every tool at your disposal to bring your story to life. Sometimes it means adding sound, more often it means taking it away.
Use Tools That Speed You Up
By now, you know how to do everything manually. That frees you to use tools that increase efficiency without sacrificing quality.
Speed Up with Matching Tools

EQ and Reverb matching tools from Accentize, Supertone, iZotope, and others can turn 10-minute tasks into 10-second ones.
They’re not perfect, but they’ll get you 80% of the way there. Your experience fills in the rest.
That final 20%? That’s where your early training and taste come through.
Final Thoughts
Don’t overcomplicate this. Make smart choices. Trust your instincts. No matter where you are in your sound career, I hope this gave you clarity on what to focus on next.
You’ve got this.
Now go make some awesome sound.